mrs. moore's blog

Thursday, August 31, 2006

Cherry Balsamic Lamb Tenderloin


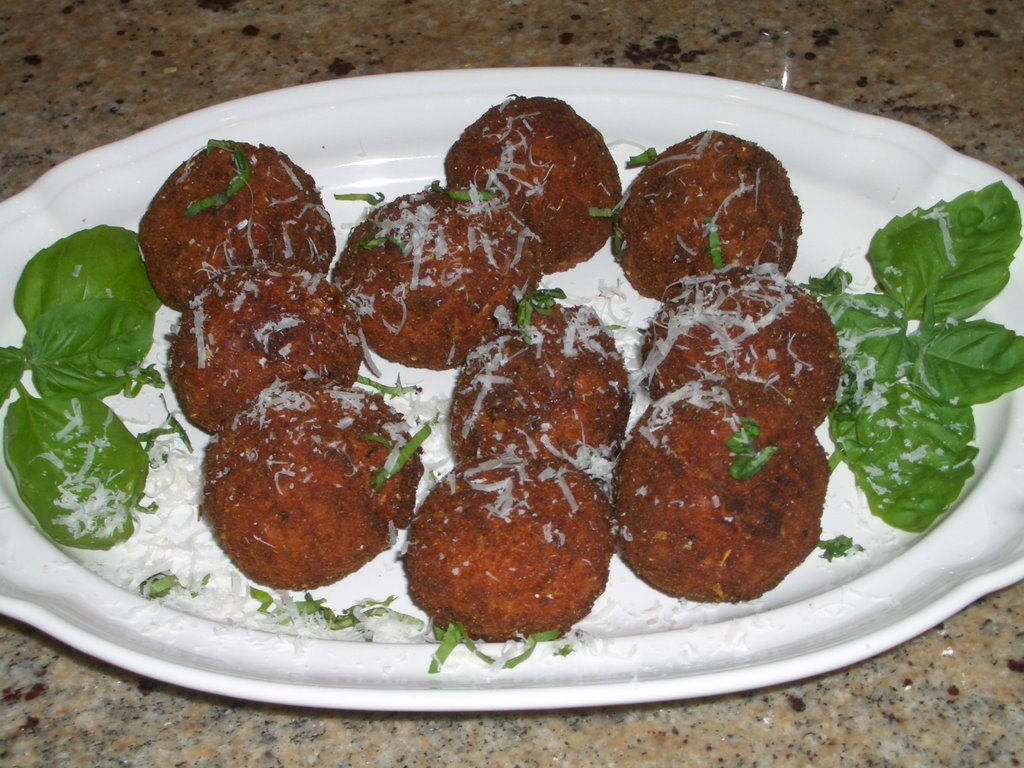
Cherry Balsamic Lamb Tenderloin *served with goat cheese and caramelized shallot potatoes

I love lamb, but don't eat it often as it can be very high in fat. I found a new cut of lamb at Wegman's this week - lamb tenderloins, which are very low in fat and calories (still high in cholesterol though....). I decided to try a new recipe since I have a standard way of serving lamb which is getting old. I found a Cherry Lamb Chop recipe on epicurious.com that called for sour cherries. I searched and searched and never did find 'sour cherries', so I decided to use sweet cherries and it was delicious. It's such a simple recipe and truly is restaurant quality! The lamb tenderloins are so small they literally took minutes on the grill and the sauce has so few ingredients it was a cinch! I served them with mashed potatoes that I mixed with caramelized shallots and goat cheese - it was just perfect! I think this same recipe would be great with many cuts of beef, including filet mignon or a simple flank steak.

origin - epicurious.com (Gourmet July 2003)
difficulty - simple
health meter - medium

1 1/2 cups fresh or frozen (not thawed) pitted sour cherries (1/2 lb)*I used frozen sweet cherries
1 tablespoon sugar
8 (3/4-inch-thick) rib lamb chops (2 lb total), trimmed of excess fat *I used lamb tenderloins and sliced on an angle
1 tbsp fresh rosemary finely chopped
1/4 teaspoon salt
1/4 teaspoon black pepper
2 tablespoons vegetable oil *I used olive oil
1 cup thinly sliced shallot (4 oz)
1/2 cup beef broth
2 tablespoons balsamic vinegar I used 3 tbsp to compensate for the sweet cherries
2 tablespoons unsalted butter
4 tablespoons finely chopped fresh mint*I omitted

Stir fresh cherries together (I halved the cherries) with sugar and macerate while browning chops(or grilling tenderloins). If using frozen cherries, stir with any juices and sugar and thaw, about 1 1/2 hours.

Pat lamb dry and sprinkle with salt and pepper and rosemary. Heat 1 tablespoon oil in a 12-inch nonstick skillet over moderately high heat until hot but not smoking, then sauté 4 chops, turning over once, about 6 minutes total for medium-rare. Transfer to a plate and loosely cover with foil. Cook and transfer remaining 4 chops in same manner. I rubbed the tenderloins with oil, salt, pepper and fresh rosemary and grilled on high for less than 3 minutes per side - remove, cover with foil until ready to serve.

Pour off fat from skillet and add remaining tablespoon oil. Heat until hot but not smoking, then sauté shallot, stirring, until golden brown, about 3 minutes. Add cherries with juices, broth, and vinegar and bring to a boil, stirring occasionally and scraping up brown bits, then reduce heat and simmer 3 minutes. Add salt and pepper to taste, then add butter and 2 tablespoons mint, stirring just until butter is melted. Slice tenderloins on the angle into 1/4 inch slices. Spoon sauce over and serve.

Goat Cheese and Caramelized Shallot Potatoes

4-6 butter or yukon gold potatoes peeled and cut into 2 inch pieces
4 tbsp butter (1 tbsp for shallots and 3 for mashing potatoes)
1 large shallot thinly sliced (approximately 1/4 cup)
1/2 cup light cream or milk warmed
4-6 oz goat cheese crumbled
salt/pepper to taste

Bring large pot of salted water to boil and place potatoes in. Cook until fork tender (approximately 8 minutes - make sure not to overcook). While the potatoes are cooking cook shallots in 1 tbsp butter on low heat until caramelized to a golden brown color. Drain potatoes well and place back in pot with 3 tbsp butter. Mash with a fork or pastry cutter until desired consistancy (I prefer chunky potatoes). You can always whip them with a hand mixer. Stir in light cream, shallots and cheese until well blended, but do not overmix or the result will be gluey potatoes. Season with salt and pepper.

Wednesday, August 30, 2006

Chicken Diane


Chicken Diane

Diane sauce is more commonly found served with Steak. It dates back to ancient times when sauces were used to tenderize meats that were very tough, like venison and other wild game. Diane was the Roman goddess of the hunt, thus why sauce Diane was originally served with venison. Today Steak Diane is the evolution of this recipe most commonly made with beef filets that are pounded thin and covered with a rich cognac sauce very often served 'flambe' tableside. Personally, I think filet is much to valuable to coat in a rich sauce that doesn't allow you to truly taste the meat, therefore I decided to make this recipe with Chicken. It's a very interesting blend of mushrooms, light cream, cognac (or brandy or sherry...), worcestershire sauce and chicken stock. Using light cream reduces the richness but certainly doesn't short you on flavor. I served this with a simple mushroom risotto and garnished it with chives. It's really delicious and not difficult to make. It's not necessary to 'flambe' the sauce, but it certainly was fun!

origin - lisa lous and Emeril Lagasse (I used his original steak diane recipe and made some changes)
difficulty - medium
health meter - medium

4 boneless skinless chicken breasts pounded thin (or thin chicken tenderloins)
1/4 cup flour
1/2 teaspoon salt
1/4 teaspoon freshly ground black pepper
1 tablespoon unsalted butter
2 tbsp olive oil
4 teaspoons minced shallots
1 cup sliced cremini mushrooms
1/4 cup Cognac or brandy or sherry
2 teaspoons Dijon mustard
1/4 cup light cream
1/4 cup chicken broth
2 teaspoons Worcestershire sauce
1 tablespoon finely chopped chives

Season the chicken on both sides with the salt and pepper and dredge in flour. Melt the butter and oil in a large skillet over medium-high heat. Add the chicken and cook for 3-4 minutes per side or until juices run clear. Remove from pan, cover and set aside. Add the shallots to the pan and cook, stirring, for 2 minutes. Add the mushrooms and cook, stirring, until soft, 2-4 minutes. Tilt the pan towards you and add the brandy. Tip the pan away from yourself and ignite the brandy with a match. (Alternatively, remove the pan from the heat to ignite, and then return to the heat.) When the flame has burned out, add the mustard and cream, mix thoroughly and cook, stirring, for 1 minute. Add the chicken stock and simmer for 1 minute. Add the Worcestershire and hot sauce and stir to combine. Return the chicken and any accumulated juices to the pan and turn to coat with the sauce. Let simmer on low until the sauce thickens slightly adding more chicken stock if necessary. Remove from heat and garnish with chives.

Tuesday, August 29, 2006

Parmesean Corn Zucchini Saute


Parmesean Corn Zucchini Saute

Coming up with new ways to serve vegetables without overpowering the main dish is always a challenge for me as I love eating vegetables with every meal I serve. I recently had dinner at The Sweet Vidalia 'down the shore' where they served a lovely piece of butter fish served on an incredibly pretty medley of fresh corn and potatoes. While it was pretty, I thought it was a bit bland. I've come up with a new combination that is truly simple but relies on the natural flavors of fresh corn, basil and parmesean cheese. For this recipe the vegetables should be 'brunoise' which means 'an exact, finely, chopped dice'. A new term, that I too just learned! Not only is this a great side dish, but it can make a beautiful presentation used as a bed to rest a main dish on. Scallops or fish would be perfect.

origin - lisa lou
difficulty - easy
health meter - high

*serves 4
2 cups fresh sweet corn - cut from the ears (no easy way to do this, just cut with a big sharp knife from the top down and work your way around)
1 zucchini finely diced (brunoise)
1/2 small red onion finely diced (brunoise)
2 tbsp butter
2 tbsp basil finely chopped
1/4 cup finely shredded parmesean cheese
salt and pepper to taste

Saute onion in butter over medium high heat until it becomes transluscent. Add corn and zucchini and stir until cooked crisp tender (about 4-5 minutes). Season with salt and pepper. Remove from heat, add basil and parmesean cheese and serve.

Sunday, August 27, 2006

Chicken Tortilla Soup


Chicken Tortilla Soup

Soups and stews are truly some of the most perfect foods you can eat. They can be made in advance, make great leftovers (soup is usually better the next day!), can be extremely healthy and what's easier than an entire meal in a bowl? I've been preparing and perfecting this chicken tortilla soup recipe for years - and think it's one of the best! I love to serve it with baked quesadillas but a salad would also make a great pairing. A trick I've recently learned to give any soup a true depth of flavor is tossing in leftover parmesean cheese rinds. You heard me, just freeze your leftover parmesean cheese rinds and pull them out whenever you're making soup. Toss one in while the soup is simmering and remove at the end. I know it sounds strange, but the flavor is incredible. I always make home made chicken broth whenever we have a whole roasted or grilled chicken and keep in the freezer. The other key to success in this recipe is fresh squeezed lime juice and honey. Get ready for fall early and try this savory soup for your next meal. This has been a 'do over' for years in our house.

origin - lisa lou
difficulty - medium
health meter - high

3 tbsp olive oil
1 large vidalia or spanish onion chopped
1 zucchini chopped into 1/2 inch pieces
2 stalks celery chopped
1 carrot chopped
3/4 cup fresh corn cut from the cob (frozen works fine too)
1 can chopped green chiles
1 tsp onion powder
2 - 3 tsp salt
1/2 tsp corriander
1/2 tsp cumin
1 tbsp dried mexican or regular oregano
2 bay leaves
1/8 tsp ground red cayenne pepper
1/2 tsp black pepper
2 tbsp honey
juice and zest of one lime
4-6 cups home made chicken broth (canned or bouillon cubes work too!)
1 28 oz can whole tomatoes chopped including juice (I love Cento brand)
1 cup torn chicken pieces
leftover parmesean cheese rind
large handful fresh cilantro chopped
finely shredded montery jack/cheddar cheese for garnish
fried tortilla strips for garnish (cut flour tortillas into 1/4 inch strips and pan fry over medium high heat in 2 tbsp vegetable oil)
chopped scallions for garnish

In a large heavy saucepan saute onion in olive oil over medium high heat until softened, approximately 4-5 minutes. Add celery, zucchini, carrots and 1 tsp salt stirring frequently for 3-4 minutes. Add onion powder, cumin, corriander, red pepper, black pepper and oregano stirring for another 2 minutes. Lower heat to medium low and add chicken broth, tomatoes, green chiles, bay leaves, corn, cheese rind, honey and lime juice and zest. Simmer for 30-45 minutes. Add chicken and continue to simmer for another 15 minutes. Correct seasonings - adding more salt if needed and stir in fresh cilantro. Serve in large bowls topped with scallions, cheese, and tortilla strips.

Wednesday, August 23, 2006

Beef Empanadas


Beef Empanadas

Empanadas are one of Brians favorite treats that he used to enjoy at a tiny joint in Soho. He's been begging me to make them, so what better way to use up the leftover beef carnitas from last night? Many cultures have a version of filled pastry pockets from calzones to pasties. Empanadas are Argentine in origin and can be either fried or baked and filled with anything from sweet to savory ingredients. If you don't want to hassle with making your own dough, simply use store bought pie crust or even puff pastry. This dough has the addition of masa harina (a form of corn meal) which makes it slightly less flakey. Next time, I would replace the masa harina with more flour. Try any filling you prefer from shredded chicken to chocolate for dessert!

origin - The Best Recipes in the World by Mark Bittman
difficulty - medium
health meter - medium

1 1/2 cup all purpose flour, plus a litt flour for rolling the dough
1/2 cup masa harina, fine cornmeal or more all purpose flour
1 1/2 tsp baking powder
1 tsp salt
1/2 cup lard, shortening or begetable oil
2 1/2 cups filling of choice (see beef carnitas entry)
1/2 cup milk *I would use egg instead as it will give you a much shinier crust

Mix the flour, masa harina, baking powder and salt together in a food processor; process for about 5 seconds. With the machine running, add the lard and process for 10 seconds. Then with the machine still running, gradually add about 1/2 cup cold water, stopping when the dough forms a ball; the dough should be fairly dry. Knead by hand until smooth, just a minute or so. You can also cut the shortening into the flour mixture with a pastry cutter until mixture resembles coarse crumbs. Divide the dough into 12 pieces, roll each piece into a ball, wrap in plastic or cover with a damp towel and let rest for at least 20 minutes. you can refrigerate the dough overnight but be sure to let it come to room temperature before proceeding. On a well floured surface, roll each piece into a 6 inch circle adding flour as necessary. Preheat oven to 450 degrees (I only heated to 425). Place a couple of tablespoons of filling on each of the circles, then fold each circle over; seal the seam with a few drops of water and press with the tines of a fork to close. Place on an ungreased baking sheet and brush lightly with milk (or egg wash). Bake until the dough is golden brown about 20 minutes. Serve immediately or at room temperature.

Caesar Salad with Polenta Croutons


Caesar Salad with Polenta Croutons

Caesar salad was invented in 1903 by an Italian cook named Giacomo Junio in Chicago, Illinois of all places! He named it after Julius Caesar, considered one of the greatest Italians of the time. Some people believe it was created in Tijuana, Mexico by Caesar Cardini, but I have a hard time believing anything so delicious came from Tijuana. Traditionally Caesar Salad is served with a warm runny egg yolk drizzled on a bed of romaine lettuce and dressed with a garlic, anchovy dressing and parmesean cheese. This recipe omits the egg and has a wonderful surprise of warm polenta croutons. Polenta got me at hello. I grew up eating fried polenta squares and it is one of my all time favorite foods. It was something my Mother ate as a child and taught me how to make it. It's certainly a bit more work, but well worth it. I added cucumbers and tomatoes to make a heartier salad. I will certainly be having polenta squares for breakfast tomorrow as this recipe makes alot of extras!

origin - Giada DeLaurentis
difficulty- easy
health meter - high

Dressing:
3 garlic cloves
4 anchovy fillets, chopped
1/4 cup fresh lemon juice
1 tablespoon Dijon mustard
1/2 cup olive oil
Salt and freshly ground black pepper

Polenta Croutons:
1 teaspoon olive oil
2 cups Basic Polenta, recipe follows
Vegetable oil, for deep frying

Salad:
3 small heads (or2 large heads) romaine lettuce, halved lengthwise
1/2 cup drained oil-packed sun-dried tomatoes, cut into thin strips I used fresh instead
1/2 cup pine nuts, toasted
1 1/2 ounces shaved Parmesan
1/2 cup chopped cucumber

To make the dressing: Finely chop the garlic and anchovies in a food processor. Blend in the lemon juice and mustard. With the machine running, gradually blend in the oil. Season the dressing, to taste, with salt and pepper.

To make the croutons: Spread the olive oil over a small baking sheet. Transfer the hot polenta to the baking sheet, spreading evenly to form an 8 by 5 by 3/4-inch-thick rectangle. Cover and refrigerate until cold and firm, about 2 hours.

Cut the polenta into 3/4-inch cubes. Pat the polenta cubes dry with paper towels, lightly coat with flour. Add enough vegetable oil to a heavy large frying pan to come 1-inch up the sides of the pan. Heat the oil over high heat. Working in batches of 10, carefully add the polenta cubes to the oil 1 at a time and fry until golden brown, stirring to keep the cubes separate, about 2 minutes. Using a slotted spoon, transfer the polenta croutons to a paper towel-lined plate to drain any excess oil.

(The dressing and polenta croutons can be prepared 1 day ahead up to this point. Cover the dressing and polenta croutons separately and refrigerate. Rewarm the polenta croutons on a baking sheet in a 350 degrees F oven before serving.)

To make the salad: Prepare the barbecue for high heat. Grill the lettuce until lightly charred, about 2 minutes per side. Cut the lettuce into bite-size pieces.

On a serving platter, mound the grilled chopped lettuce. Decoratively scatter the sun-dried tomatoes and pine nuts. Drizzle with enough dressing to evenly coat. Sprinkle Parmesan and scatter the warm polenta croutons over and serve immediately.

Basic Polenta:
3 cups water You really need 4 cups of water
1 teaspoon salt
1 cup yellow cornmeal
2 tablespoons unsalted butter
1 tsp chili flakes
1/2 cup parmesean cheese finely grated

Bring 3 cups of water to a boil in a heavy large saucepan. Add salt. Gradually whisk in the cornmeal and chili flakes. Reduce the heat to low and cook until the mixture thickens and the cornmeal is tender, stirring often, about 12 to 15 minutes. Turn off the heat. Add the butter and parmesean cheese, and stir until melted.

Lightly oil a half sheet pan. Transfer the hot polenta to the prepared baking dish, spreading evenly to 3/4-inch thick. Refrigerate until cold and firm, about 2 hours.


Tuesday, August 22, 2006

Beef Carnita Tostadas


Beef Carnita Tostadas

Carnitas actually means 'little meats' in spanish. Most commonly carnitas are shredded pork, but this recipe is shredded beef. This is very similar to my Shredded Pork Burritos but instead of using pre packaged taco seasoning, I used a wet rub on the beef before slow cooking it for 4 hours. At the end I added a combination of diced tomatoes, green chiles and several more spices to develop a succulent mixture that I served over crispy flour tacos! This would be a fantastic recipe for the crock pot and the meat can be used as a filling for burritos, taco's, or even a sandwich. Add any toppings you like!

origin - lisa lou
difficulty - easy
health meter - medium (chuck roast isn't the leanest cut of meat!)

2-3 lb beef chuck roast
wet rub
1/4 cup prepared salsa
2 tbsp chile powder
1 tbsp dried oregano
1 tbsp cumin
1 tsp salt
1 tsp onion powder
2 cloves minced garlic *optional

1 small yellow or vidalia onion chopped
1 tbsp olive oil
1 can diced tomatoes including juice
1 can chopped green chiles
2 tbsp fresh cilantro chopped
1 tbsp chile powder
1 tsp cumin
1 tsp dried coriander
1 tsp onion powder
1 tsp salt

Combine wet rub ingredients and pat all over the chuck roast. Enclose the beef in a tinfoil pouch and place in roasting pan. Cook for 4 hours in a 300 degree oven. Remove from pouch and cut away any fat or bones. Shred the beef with two forks. Saute the onion and olive oil over medium heat in the same pan until softened - about 7 minutes. Add the beef and remaining ingredients and cook over medium heat for 10 minutes. I like to serve over pan fried flour tortillas with guacamole, shredded cheese, salsa fresca, and sour cream!

Salsa Fresca


Salsa Fresca

Salsa dates back as far as the Ancient Aztecs, Mayans and Incas. It was believed that the chile peppers in the salsa actually warded off fevers and helped stimulate the digestive organs. Salsa is widely used in many different ways today from a condiment served with fish or meat to my favorite - a chunky dip served with tortilla chips. Although there are many fancier, trendier versions, my favorite has always been fresh Salsa Fresca. If you have good tomatoes (not over or under ripe) it is so simple to prepare and much tastier than the jar stuff! I happen to stumble across some yellow and orange tomatoes which added beautiful color to this salsa.

origin - lisa lou
difficulty - easy
health meter - high

4-6 plum tomatoes chopped
1/2 medium red onion finely chopped
1/2 yellow tomato chopped
1/2 orange tomato chopped
2 tbsp fresh cilantro chopped
1 clove garlic minced *optional
few shakes of chile peppers based on your preference of spice
1 small poblano chile peeled, seeded and chopped (I like to char the chile either in the oven or over a gas flame to enable me to peel the skin off)
juice of one lime
1 tbsp olive oil
salt/pepper to taste
1 -2 tsp sugar

Combine all ingredients and let refrigerate for at least 20 minutes. Drain some of the juice off and serve.

Grilled Pineapple Cinnamon Cookie Delight


Grilled Pineapple Cinnamon Cookie Delight

I have tried several grilled pineapple recipes and either ended up with watery mush or overly sweet nothing. I was determined to find something that worked as it is one of the most delicious fruit desserts I have ever eaten! I wanted to develop something that incorporated cinnamon and frozen yogurt and came up with an absolutely scrumptous concoction. Layers of fresh cinnamon sugar cookies, grilled pineapple with a warm brown sugar coating topped with vanilla frozen yogurt! It sounds complicated but really isn't. You can make the cookies up to 2 days in advance and slicing pineapple is not difficult. So if you're looking for a refreshing end of the summer treat - try my Grilled Pineapple Cinnamon Cookie Delights!

origin - lisa lou
difficulty - medium
health meter - medium (it is fruit after all....)

Cinnamon Sugar Cookies
1/4 cup sugar
2 tbsp. ground cinnamon

2 1/2 c. all-purpose flour
1/2 tsp. baking soda
1/4 tsp. salt
1 c. dark brown sugar, packed
1/2 c. white sugar
1 c. salted butter, softened
2 lg. eggs
2 tsp. pure vanilla extract
Preheat oven to 300 degrees.
In a small bowl combine sugar and cinnamon for topping. Set aside.
In a medium bowl combine flour, soda and salt. Mix well with a wire whisk and set aside.
In a large bowl blend sugars with an electric mixer set at medium speed. Add the butter and mix to form a grainy paste. Scrape sides of bowl, then add the eggs and vanilla extract. Mix at medium speed until light and fluffy.
Add the flour mixture and blend at low speed just until combined. Do not overmix. Shape dough into 1" balls and roll each ball in cinnamon-sugar topping.
Place onto ungreased cookie sheets, 2" apart. Bake for 18 to 20 minutes. Immediately transfer cookies with a spatula to a cool, flat surface. Yield: 3 dozen cookies.

Grilled Pineapple
1/2 inch slices of pineapple (one slice makes one serving)
1/2 cup brown sugar
leftover cinnamon sugar from the cookies

Pat brown sugar onto both sides of each pineapple slice and sprinkle with cinnamon sugar. Grill on medium high heat for approximately 2-3 minutes per side or until the brown sugar is bubbly and the pineapple is heated through.

Assembly
Place one slice of warm grilled pineapple on one cookie and top with one scoop of vanilla frozen yogurt (I use yogurt because it is less sweet than ice cream and the pineapple is already very sweet). Garnish with a sprinkling of cinnamon sugar and serve.

Thursday, August 10, 2006

Chili Pepper Hummus


Chili Pepper Hummus

Hummus is quite possibly the worlds most perfect food! It's so high in protein and low in calories and fat. You can serve it a million different ways - but my favorite is to eat it as a dip with toasted pita chips. Hummus dates back over 7000 years ago and is Middle Eastern in origin. I have a favorite recipe that I've been making for years, but had a suggestion that I try 'flavoring' the hummus which is so popular today. So I've included my old stand by recipe with the additional, optional ingredient to make this delicious Chili Pepper Hummus! It's so simple to make and you can alter the flavors to your liking - you really should try it. Enjoy.

origin - lisa lou
difficulty - simple
health meter - high

1 15 oz can chick peas (aka garbonzo beans) with the liquid reserved. I prefer the Progresso brand, don't go for the cheapest, it really does make a difference.
juice of one lemon
3 tbsp olive oil
1 medium shallot chopped or 2 cloves of garlic chopped
1/4 cup tahini (sesame paste found at local grocery stores)
salt/pepper to taste
1-2 tsp fresh ground chili paste (can find at asian markets)

Combine all ingredients except chili paste in food processor or blender and puree until smooth. Continue adding the reserved liquid from the chick peas in small amounts (up to 1/2 cup) until desired consistancy is reached. Lastly add the chili paste and serve. I like to cut pita bread in eighths, toss with a bit of olive oil and salt and toast in a 350 degree oven for 10 minutes or until golden brown.

Wednesday, August 09, 2006

Lamb, Artichoke and Rosemary Stew


Lamb, Artichoke and Rosemary Stew

I know you are all thinking - stew in the summer?? I enjoy soups and stews as much as I love salads and right now, I kind of miss them! Since the heat wave has broke I thought it might be a nice change. This recipe comes from 'The Daily Soup Cookbook' which is by far the best soup book I've found. Do you remember the Seinfeld episode with the 'soup nazi'? Well this is the book of those recipes! I highly recommend this book and it even has a vegetarian section. This stew braises lamb shanks or chops for over 2 hours until the meat is falling off the bone. The artichokes add such a wonderful clean flavor keeping this stew very light. I love to serve it over egg noodles or with home made biscuits, but it would be great with anything. Crank up the air conditioning and try this one! You'll love it.

origin- The Daily Soup Cookbook *note I am giving you the recipe with my changes only
difficulty - easy but time consuming because of the cooking time
health meter - medium (lamb isn't the leanest meat)

5 tbsp olive oil
5 lamb shanks or chops
1 large vidalia onion chopped
2 celery stalks chopped
3-4 leeks rinsed well and chopped
2 garlic cloves
1 tbsp dried rosemary (I like to grind up the whole leaves instead of using powdered)
2 bay leaves
2 tsps kosher salt
4 cups strong chicken broth
1 28 oz can whole tomatoes roughly chopped with juice
2-3 tbsp tomato paste
1 cup red wine
1 can quartered artichoke hearts
1 tbsp balsamic vinegar
1/2 cup chopped scallions for garnish

Preheat oven to 325 degrees. heat 4 tablespoons of the oil in a large dutch oven over medium high heat. Add the lamb shanks and brown on all sides. Remove from pot. Add the onions, celery, leeks and garlic to the same pot including the oil and sweat for 4 minutes until tender. Add the rosemary, bay leaves, and salt. Stir to coat. Return the lamb to the pot and add chicken stock, tomatoes and tomato paste. Bring to a boil. Place covered pot in oven and braise for 2 - 2 1/2 hours. Remove from oven and remove lamb shanks. Pull the meat from the bones (discarding fat and bones) and return to the pan. I like to skim any excess oil off the top before returning the meat. Place the pot over medium heat and stir in the artichokes and balsamic vinegar. Simmer for 5 minutes. Remove the bay leaves and serve topped with chopped scallions.

Tuesday, August 08, 2006

Lemon Chicken Penne Salad


Lemon Chicken Penne Salad

Pasta salads can be such great, healthy, make ahead meals - so I've been experimenting with new recipes to find some wonderful alternatives. It's so easy to add any combination of ingredients but the difference is always the dressing. I'm tired of vinaigrettes, but didn't want the fat of a typical creamy dressing, so I lightened up the creamy lemon dressing from the Summer Bean Salad to create a very low calorie option. My favorite combination has been asparagus, cherry tomatoes, shredded chicken and fresh mozerella. I've also made this same salad vegetarian with green beans, sugar snap peas, cherry tomatoes and mozerella. Truly be creative here. But remember, the key is in the dressing!

origin - lisa lou
difficulty - easy
health meter - high

1 box penne pasta cooked according to package (slightly undercook if you plan to make this ahead as the dressing will soften the noodles a bit)
1 pint cherry tomatoes quartered
1 bunch asparagus sliced on the diagonal into 1 inch pieces boiled crisp tender and shocked in an ice bath
1 cup chopped fresh mozerella (next time I plan to try shredded gruyere cheese to add more of a bite)
1 shallot finely chopped
1 large handful fresh parsley finely chopped
4 slices of bacon cooked and crumbled
2-3 boneless skinless chicken breasts, poached in chicken broth/white wine combo and shredded
1/2 cup toasted pecans roughly chopped *optional

creamy lemon dressing
1 cup light sour cream
juice of one lemon
1 tbsp dijon mustard
1 tbsp spicy ground mustard
2 tsp sugar dissolved into 1/4 cup warm water
1/3 cup olive oil
salt/pepper to taste

Combine all dressing ingredients except the olive oil. Slowly whisk in the olive oil to emulsify. Combine all salad ingredients except the pecans into a large bowl and add dressing. Either serve immediately or make one day ahead but do not dress until you are ready to serve. Garnish with pecans and additional parsley.

Wednesday, August 02, 2006

Blueberry Madeleines


Blueberry Madeleines

There is much debate over the origin of Madeleines, but my here is what I like to believe. They were made by a peasant girl in Commercy, France and discovered by a Duke who was very taken with 'Madeleine's' little cakes. They are little buttery sponge cakes that are baked in a Madeleine pan which resembles seashells. They are best served warm out of the oven with coffee (served with lemon curd is another great idea) and make a delicious snack. The blueberries and orange zest in this recipe have a wonderful flavor and certainly make them more interesting. Madeleines are commonly found all over France.

origin- Tyler Florence 'Eat This Book'
difficulty - easy
health meter - medium (they are small....)

1 c. all-purpose flour
1 tsp. baking powder
2/3 cup sugar
4 large eggs
Grated zest of 1 orange
1/2 cup (1 stick) unsalted butter, melted and cooled
1 14-oz. can blueberries, drained *I used small frozen blueberries thawed and drained

To make the madeleines, sift the flour with the baking powder into a mixing bowl. In another bowl, whisk the sugar and the eggs together. Whisk in the orange zest. Then fold in the flour mixture, sifting it over the egg mixture in three batches. When the last batch is almost incorporated, drizzle the butter over the batter and fold in very gently. Chill in refrigerator for 20 to 30 minutes. Preheat the oven to 400°F. Butter and flour two madeleine molds. When the batter is cold, spoon into molds, filling each one about two-thirds full. Dot the top of each with 4 or 5 blueberries, pressing them gently into the batter. Bake until golden brown, 12 to 15 minutes.


Pear and Goat Cheese Salad


Pear and Goat Cheese Salad

Fruit is a wonderful way to add brightness to any green salad. However, alot of people think they don't like fruit in salads because it can overpower the salad. Pears are the perfect solution - they are crisp, juicy, yet not too sweet and quite subtle in flavor. Selecting pears can be quite a mystery as you're never quite sure what you'll get. An under ripe pear is not good. I recently discovered Taylor Gold Pears, a variety from New Zealand, and they were wonderful. Always remember to toss your pears in lemon juice to prevent them from browning. Paired with goat cheese and toasted pecans and topped with a lemon vinaigrette make this salad the perfect start to any meal. Sliced avocados would also work great on this salad.

origin - lisa lou
difficulty - simple
health meter - high

1/2 cup crumbled goat cheese
4 cups spring greens with arugula mixed in
1 Taylor Gold Pear sliced
1/4 cup toasted pecans roughly chopped
kosher salt/ground pepper to taste

lemon vinaigrette -see steak salad posting

Toss all ingredients and dress salad with lemon vinaigrette. Serve.

Tuesday, August 01, 2006

Creamy Farfalle with Cremini, Asparagus and Pine Nuts


Creamy Farfalle with Cremini, Asparagus and Pine Nuts

Cooking for vegetarians can sound so intimidating - nightmares of tofu and soy milk?!? But when you consider all of the wondeful vegetables that are available right now, it's really not hard at all. Pasta is always a safe bet, served with a salad it can easily make a complete meal. This recipe was recently featured on Everyday Italian (yes my favorite chef!) as a 'sauceless pasta', but I decided to make it a bit more 'saucey' by adding some marsala wine and substituting pine nuts for walnuts (the recipe orignally called for). The marscapone cheese makes this pasta so creamy and delicious - rich yet light. Farfalle actually means bowtie in italian and is a very hearty pasta shape that holds sauces very well. You could easily add chicken to this recipe if you don't want vegetarian.

origin - Giada DeLaurentis
difficulty - easy
health meter - medium

1 pound farfalle pasta
3 tablespoons butter
1 pound cremini mushrooms, thickly sliced
1 pound thin asparagus, trimmed, cut crosswise into 1-inch pieces
1 cup mascarpone cheese
2 cups marsala wine
1/2 cup light cream
1/2 cup cold water with 1 tsp cornstarch mixed in
Pinch freshly grated nutmeg
3/4 cup walnuts, toasted *I used pine nuts instead
1/4 cup freshly grated Parmesan *I increased this to 2/3 cup


Bring a large pot of salted water to a boil. Add the farfalle and cook until al dente, stirring occasionally, about 12 minutes. Drain, reserving 1 cup of pasta water. (I didn't need the extra water because I made a true sauce)

Meanwhile, melt the butter in a heavy large skillet over medium heat. Add the mushrooms and saute until tender and most of the juices have evaporated, about 5 minutes. Add the asparagus and saute until the asparagus is crisp-tender, about 5 minutes. Remove from pan and add the marsala wine to the same pan, reduce by half over medium high heat. Add the light cream and let simmer for 3 minutes. Reduce the heat and add marscapone and parmesean cheese, and nutmeg. Add the mushrooms and asparagus back (you don't leave them in the sauce because they would overcook) Add the farfalle and garnish with pine nuts, serve. Stir in the mascarpone and nutmeg and toss until the cheese coats the pasta, adding the reserved cooking liquid 1/4 cup at a time to moisten. Stir in 1/2 cup of walnuts (or pine nuts). Season the pasta, to taste, with salt and pepper. Mound the pasta in a large bowl. Sprinkle with the Parmesan and remaining 1/4 cup of walnuts. Serve.

Arancini Di Riso


Arancini Di Riso

Never before had I heard of Arancini, and then in one week not only did my Aunt sent me a recipe from Met Home magazine but Giada also featured them on Everyday Italian. That would be called a trend. Arancini are fried risotto balls with secret surprises hidden inside, like fresh mozerella cheese, peas, or even mushrooms. Arancini are commonly found in Italy and are even sold as street snacks. It originated from finding uses for leftover risotto and soon became an excuse to make risotto! Not only can Arancini be served as a wonderful appetizer, but served over greens makes a complete meal. I served them as a tasty starter last night for friends that came to dinner. They are a bit putsy as the mixture is challenging to keep in ball shapes, but read below for some secret hints to the perfect Arancini! Next time I would serve them with a little marinara sauce.

origin - Met Home / Giada De Laurentis
difficulty - medium
health meter - low (they are fried rice with cheese....)

Vegetable oil, for deep-frying
2 large eggs, beaten to blend
2 cups Risotto with Mushrooms and Peas, recipe follows, cooled *or check out the previous entry for creamy lemon risotto and follow recipe, but do not add the marscapone, lemon juice and egg yolks. Any leftover risotto will also work.
1/2 cup grated Parmesan
1/2 cup fresh basil chopped
1 1/2 cups dried Italian-style bread crumbs
2 ounces mozzarella, cut into 1/2-inch cubes *fresh mozzerella is great
Salt
1 cup flour for dredging balls
3 eggs beaten

Pour enough oil in a heavy large saucepan to reach the depth of 3 inches. Heat the oil over medium heat to 350 degrees F. Be careful that the oil is not too hot or the balls will cook too quickly and the inner cheese will not melt.

Stir the 2 eggs, risotto, Parmesan, basil and 1/2 cup of the bread crumbs in a large bowl to combine. Place the remaining breadcrumbs in a medium bowl. If the mixture is too hard to shape, add some more bread crumbs, but keep in mind, it is supposed to be kind of sticky. Place the flour on a plate and the 3 beaten eggs in a medium bowl. Using about 2 tablespoons of the risotto mixture for each, form the risotto mixture into 1 3/4-inch-diameter balls. Insert 1 cube of mozzarella into the center of each ball and make sure that the rice is closed around the cheese so it will not ooze out. Dredge the balls in flour, then dip in egg and finally Roll the balls in the bread crumbs to coat. I refrigerated the balls for a few hours at this point so they would hold their shape better.

Working in batches, add the rice balls to the hot ail and cook until brown and heated through, turning them as necessary, about 4 minutes. Using a slotted spoon, transfer the rice balls to paper towels to drain. Season with salt. Let rest 2 minutes. Serve hot. The balls can be kept in a 250 degree oven until you are finished. If you don't think they are cooked enough, raise the temperature of the over to 325 and finish cooking for 5 minutes.

Mushroom Risotto with Peas: I used a very simple, basic risotto.
8 cups canned low-salt chicken broth
1/2-ounce dried porcini mushrooms
1/4 cup unsalted butter
2 tablespoons olive oil
2 cups finely chopped onions
10 ounces white mushrooms, finely chopped
2 garlic cloves, minced
1 1/2 cups Arborio rice or short-grain white rice
2/3 cup dry white wine
3/4 cup frozen peas, thawed
2/3 cup grated Parmesan
Salt and freshly ground black pepper, optional
Bring the broth to a simmer in a heavy medium saucepan. Add the porcini mushrooms. Set aside until the mushrooms are tender, about 5 minutes. Keep the broth warm over very low heat.

Melt the butter in a heavy large saucepan over medium heat. Add olive oil. Add the onions and saute until tender, about 8 minutes. Add the white mushrooms and garlic. Using a slotted spoon, transfer the porcini mushrooms to a cutting board. Finely chop the mushrooms and add to the saucepan. Saute until the mushrooms are tender and the juices evaporate, about 5 minutes. Stir in the rice and let it toast for a few minutes. Add the wine; cook until the liquid is absorbed, stirring often, about 2 minutes. Add 1 cup of hot broth; simmer over medium-low heat until the liquid is absorbed, stirring often, about 3 minutes. Continue to cook until the rice is just tender and the mixture is creamy, adding more broth by cupfuls and stirring often, about 28 minutes (the rice will absorb 6 to 8 cups of broth). Stir in the peas. Mix in the Parmesan. Season with salt and pepper, to taste.